So, you’ve been growing your own indoor cannabis plants, huh? That’s quite the green thumb you’ve got there! But now comes the tricky part – knowing exactly when and how to harvest those beautiful buds. Don’t worry, my friend, I’ve got you covered.
In this article, we’re going to delve into the art of harvesting indoor cannabis plants, sharing tips, tricks, and a little bit of humor along the way. So buckle up and get ready for a wild ride through the world of cannabis cultivation!
Now, before we dive into the nitty-gritty details, let’s talk about timing. Knowing the right time to harvest your cannabis plants is crucial for achieving that perfect balance of potency and flavor. You don’t want to harvest too early and end up with weak buds that leave you feeling underwhelmed, or harvest too late and end up with a couch-lock-inducing experience that leaves you glued to the sofa. We’re aiming for that sweet spot in the middle.
So grab your magnifying glass, put on your detective hat, and get ready to examine those trichomes like a cannabis Sherlock Holmes. It’s time to embark on a journey that will reward you with the finest buds you’ve ever tasted.
Let’s get harvesting!
Key Takeaways
- Timing is crucial for harvesting indoor cannabis plants, as trichomes change from clear to milky white and possibly amber.
- Harvesting requires patience and observation, as proper techniques involve cutting off branches and trimming excess leaves.
- Drying and curing methods are important for maximizing potency, with curing involving placing dried buds in airtight containers.
- Storing and preserving harvested cannabis requires airtight glass jars, and common mistakes to avoid include rushing the process and going overboard with trimming.
Determining the Right Time to Harvest
Now that you know the basics of growing indoor cannabis, it’s time to learn when and how to harvest your plants!
Determining the right time to harvest can be a delicate process, just like deciding when to eat that last slice of pizza. But fear not, my friend, for I shall guide you through this green adventure!
The first indicator that your cannabis plants are ready for harvest is the appearance of the trichomes. These tiny, hair-like structures on the buds will change color from clear to milky white. Think of them as the mood ring of your plants. When they turn milky white, it’s a sign that the THC levels are at their peak, and your buds are ready to be plucked.
But wait, there’s more! If you want an even more potent experience, look out for the trichomes to turn amber. This means that the THC is starting to degrade into a more sedative compound called CBN. It’s like the plant is whispering, “Hey, want to relax even more? Harvest me now!”
So, if you’re after a couch-lock kind of high, keep an eye out for those amber trichomes.
Harvesting your indoor cannabis plants is no rocket science, but it does require a bit of patience and observation. So grab your magnifying glass and take a close look at those trichomes. It’s time to unleash the full potential of your green babies!
Proper Techniques for Harvesting Indoor Cannabis Plants
First, you gotta make sure you’re using the right techniques to get the most out of your indoor cannabis harvest. It’s not just about snipping off the buds and calling it a day. Oh no, my friend, there’s a whole process to it. So grab your scissors and let’s get to work!
When it comes to harvesting your indoor cannabis plants, timing is everything. You want to wait until the trichomes, those little resin glands on the buds, are at their peak. They should be milky white in color, with just a few amber ones thrown in for good measure. This is when the THC levels are at their highest, and trust me, you want those potent buds.
Now, onto the actual technique. Start by cutting off each individual branch, leaving a small stem attached. Then, use your scissors to trim off any excess leaves. You want to focus on the big fan leaves first, and then move on to the smaller sugar leaves. This will help improve the overall appearance of your buds and make them look more professional.
So there you have it, my friend. Harvesting indoor cannabis plants is all about timing and technique. Follow these steps, and you’ll be rewarded with some seriously dank buds.
Happy harvesting!
Drying and Curing Methods for Maximum Potency
To achieve maximum potency, it’s crucial to employ effective drying and curing methods for your indoor cannabis crop.
Once you’ve harvested your beautiful buds, it’s time to give them some TLC. Think of it as a spa day for your plants, but instead of cucumbers on their eyes, they get hung up to dry.
First things first, you want to trim off any excess leaves and branches. You don’t want those getting in the way of your buds’ beauty sleep. Plus, it’ll make them look all fancy and ready for a red carpet event.
Next, find a dark and dry space to hang your buds. And no, I’m not talking about your ex’s basement. We want a controlled environment where your cannabis can relax and unwind. Hang them upside down, like a bunch of bats waiting for their midnight snack. Make sure there’s good airflow, though. We don’t want any musty odors ruining the party.
And speaking of parties, don’t forget to check on your buds regularly. Give them a little shake and a pep talk, just to keep their spirits high.
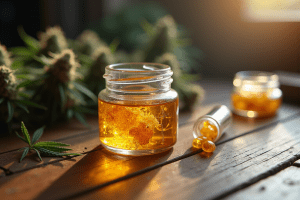
After a week or two of hanging out, it’s time to move on to the curing stage. Think of this as the final touch to make your cannabis the best version of itself. Place your dried buds in airtight containers, like little weed coffins. But instead of burying them, you want to open those coffins every day for the first week. Let them breathe and get some fresh air, just like you would after a long nap. This helps to release any remaining moisture and encourages the development of those tasty terpenes.
Storing and Preserving Your Harvested Cannabis
Once you’ve successfully brought in your bountiful crop, it’s time to lock away your precious buds in the vault of long-lasting freshness. Think of it as the Fort Knox of cannabis preservation, where your hard work and dedication will pay off in the form of perfectly preserved potency.
So, how do you go about storing and preserving your precious harvest?
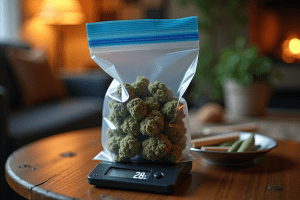
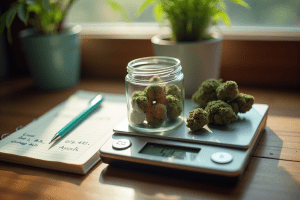
First things first, you’ll need proper containers. Say no to flimsy plastic bags and invest in some airtight glass jars. These jars will not only keep your buds safe from light and moisture, but they’ll also prevent any unwanted odors from escaping and alerting your nosy neighbors. Plus, they make your stash look extra fancy, like a collection of rare artifacts in a secret underground lair. Just make sure to fill the jars up to about 75% capacity to allow for proper airflow and prevent the buds from getting squished.
Now, let’s talk about where to keep your precious stash. While it may be tempting to display your bountiful harvest like a trophy, it’s best to keep it in a cool, dark, and dry place. Think of it as a secret hideout for your buds, away from prying eyes and the wrath of humidity. A closet or a dedicated storage area will do the trick, just make sure the temperature stays between 60-70 degrees Fahrenheit and the humidity level is around 55-62%.
Moreover, it’s like peeking at your presents before Christmas morning – the surprise is part of the fun! So, lock away your stash and let it age like a fine wine, knowing that the longer you wait, the better it will be.
Common Mistakes to Avoid During the Harvesting Process
Avoid making these common mistakes during the harvesting process of your indoor cannabis plants if you want to achieve the best possible results and maximize your yield. Trust me, you don’t want to end up with a bunch of sad, droopy plants that make you question your gardening skills. So, here are a couple of things to avoid like the plague:
- Don’t rush the process: Look, I get it. You’re excited to finally enjoy the fruits of your labor, but patience is key here. Harvesting too early can lead to a less potent product and a major buzzkill. So, hold off on cutting those buds until they are ripe and ready. Trust me, your patience will be rewarded with some density-dank buds that will knock your socks off.
- Don’t go crazy with the trimming: I know, I know. You want your buds to look pristine and magazine-worthy, but going overboard with the trimming can do more harm than good. Sure, you want to remove any excess leaves and stems, but don’t go all Edward Scissorhands on your poor plants. Those leaves contain some valuable cannabinoids, so give ’em a break and leave a little green on your buds. Your plants will thank you, and so will your high.
Now that you know what not to do, go forth and harvest your indoor cannabis plants like a pro. Don’t forget, a little patience and a light touch can go a long way in producing some top-notch bud.
Happy harvesting!
Frequently Asked Questions
What are the signs of overripe cannabis plants?
If your cannabis plants are looking like a bunch of raisins, they’re overripe! Just like a forgotten fruit, overripe buds lose potency and flavor. Keep a close eye on your plants to avoid this sad fate.
Can I harvest my cannabis plants in stages?
Absolutely! Harvesting your cannabis plants in stages can be a great idea. It allows you to enjoy the fruits of your labor while also giving the other buds a chance to reach their full potential. Plus, who doesn’t love a staggered harvest? It’s like a cannabis party that lasts longer!
How long should I dry and cure my harvested cannabis?
You’ve carefully harvested your precious cannabis, now it’s time to give it the royal treatment! Hang those buds up like a disco ball and let them dance to the rhythm of time for about 7-10 days. Then, cure them like a fine wine for 2-4 weeks. Patience, my friend, will reward you with a smoke that’s smoother than Barry White’s voice.
What are the best storage methods for preserving the potency of my harvested cannabis?
To preserve the potency of your harvested cannabis, store it in airtight glass jars in a cool, dark place. Avoid plastic bags or containers as they can compromise the flavor. Remember, keeping your stash fresh is like protecting the holy grail of relaxation.
Are there any alternative uses for cannabis trimmings or leftover plant material?
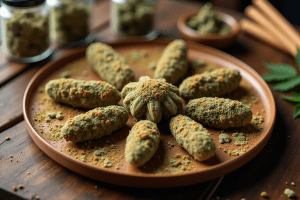
You won’t believe the endless possibilities for your cannabis trimmings! From making potent edibles to crafting soothing topicals, those leftovers are like a hidden treasure trove waiting to be explored. Get creative and let the magic unfold!

Hi there! I’m Ayesha, a writer who loves creating stories that connect with people. I enjoy learning about health and wellness and sharing what I find on my blogs at Leafy Mate. My blogs are like taking a trip through the newest discoveries and timeless wisdom about staying healthy and feeling good. Join me on this adventure, where I explore and share simple ways to live a better, more nourishing life.
Get Your Medical Card
Connect with a licensed physician online in minutes

Your cannabis AI assistant
Tailored recommendations for your favorite
Sign up below for early access
*By signing up, you agree to the Terms and Conditions and Privacy Policy. California residents, see our CA Privacy Notice.
Share this article


Share this article